


artists at work! this week's summer spotlight!
Updated: Sep 15
Monday, August 10, 2026
We love a summer sunset
and we’ve witnessed a few spectacular ones during the past few weeks!
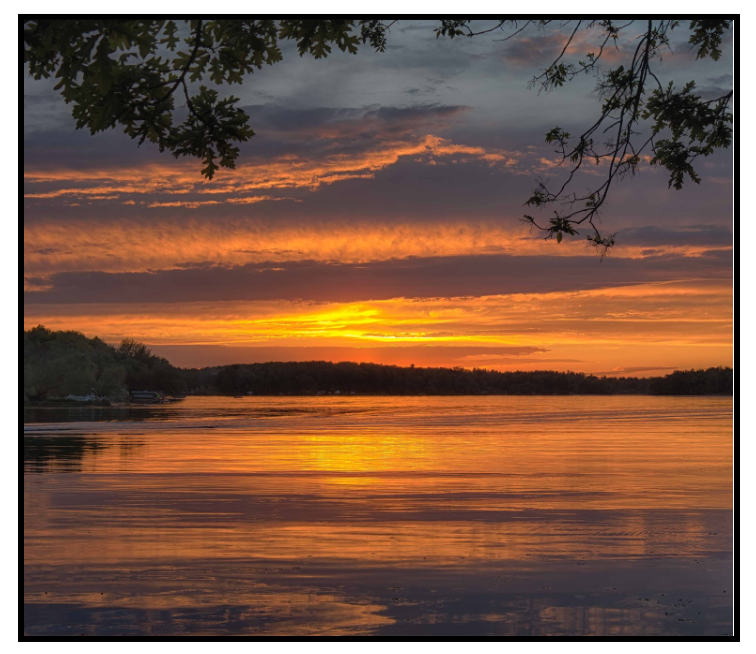
What a blessing each one is at the end of a hot summer day!

Yes, God’s artwork inspires us all!
Art is all around us!
However, art is more than a picture hanging on a wall or even in a museum.
At its heart,
art is a way of expressing what we think, feel, imagine, and experience.
It gives us a way to turn our inner thoughts and ideas
into something we can see, touch, hear, or share with others.
When we create art we open our mind to new ideas,
we find new ways to problem solve and we find JOY!
In this week’s post - the next in our Summer Spotlight series,
we highlight a variety of ways to share art experiences with our Littles,
our grandkids, our own children or others in our care!
What fun to create messy JOY together!

For our Littles, art isn't about creating a perfect picture.
It's about exploring, experimenting, expressing, and discovering the artist within.

When it comes to art experiences for our Littles,
there’s room for both process and product art experiences!
Each offers something valuable - from exploring ideas, making choices, and expressing creativity TO learning new skills and following directions! The key is understanding the difference and knowing when each type of experience can best support a child’s learning and development.
Process art asks, “What can you create?”
Product art says, “Let’s create this.”
Let’s take a closer look at what makes process art and product art different—and why both have a place in our Littles’ creative world!
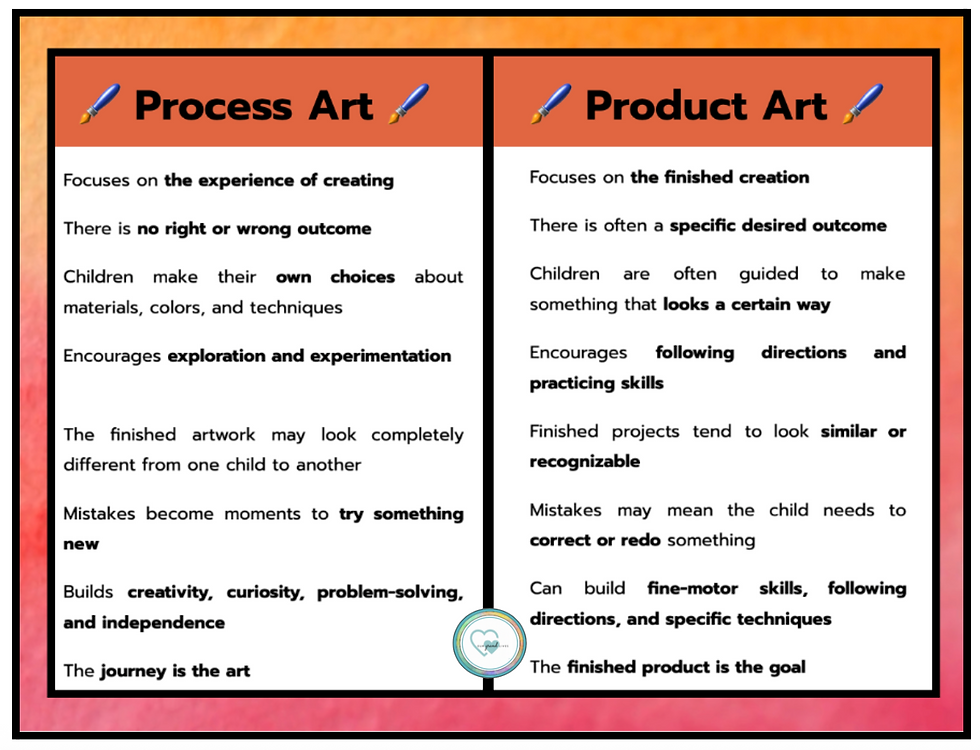
As kindergarten teachers, we each made room for both kinds of art experiences regularly in our classrooms. We knew that creating a specific project (product based) could help children learn skills and techniques, while open-ended, process-based art gave them the freedom to explore, experiment, and express their own ideas. We knew that our students benefited from having opportunities to do both!
For this post, however, we’re shining the spotlight on the experience of creating, with process-based art ideas that invite our Littles to explore, discover, and let their imaginations lead the way!
Because when it comes to process art,
the magic is in the making!


One of the best things about embracing process art
Is how truly easy it is to set up!
Often, you just need to provide the materials
or even let your older Littles find/choose their own!
We hope you find the experiences we’re sharing here
helpful, fun and doable,
since many include supplies found in your own home!
Process Art with Younger Littles!
It’s never too early to do art with our Littles!
Babies are curious and eager to explore their surroundings!
When our littlest Littles engage in creative art activities, it is a whole body experience! In fact, they are often more likely to be interested in grasping, chewing, pounding, squishing and even tasting than they are in trying to actually create something.! Creating art with your infant and toddler Littles engages so many of their senses and by doing this, they are learning about the world around them! ♥
We’ve found that with a little bit of creative planning, many art experiences can be adapted and used with our youngest Littles!
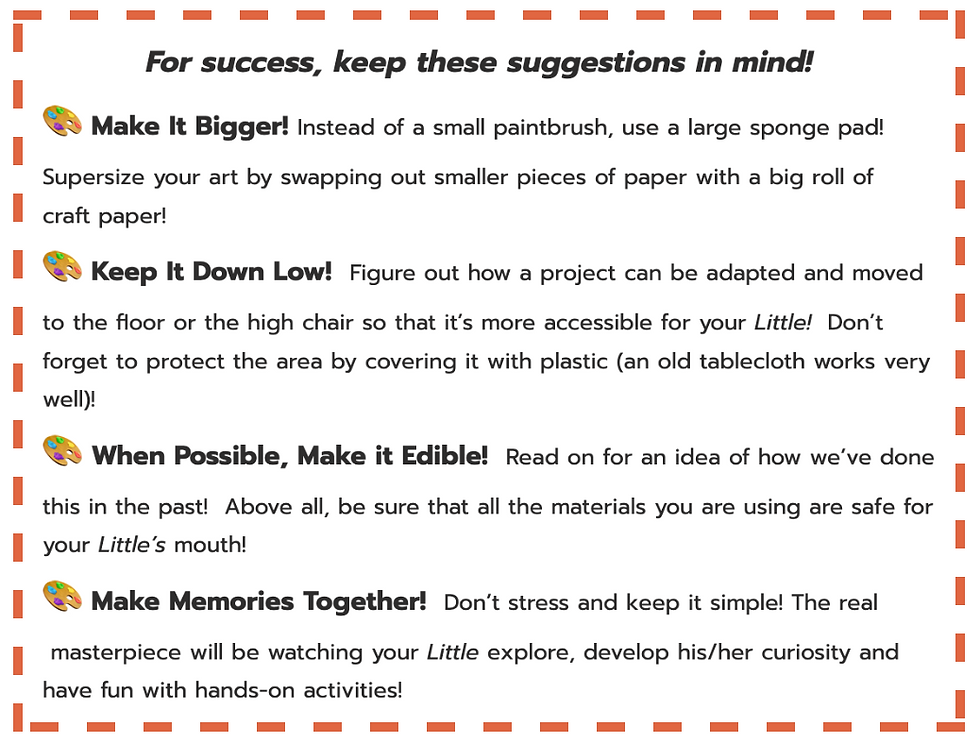
Here are a few of the fun ways we explored art with our Littles
when they were younger!
INFANT ART! (3-6 months & older)
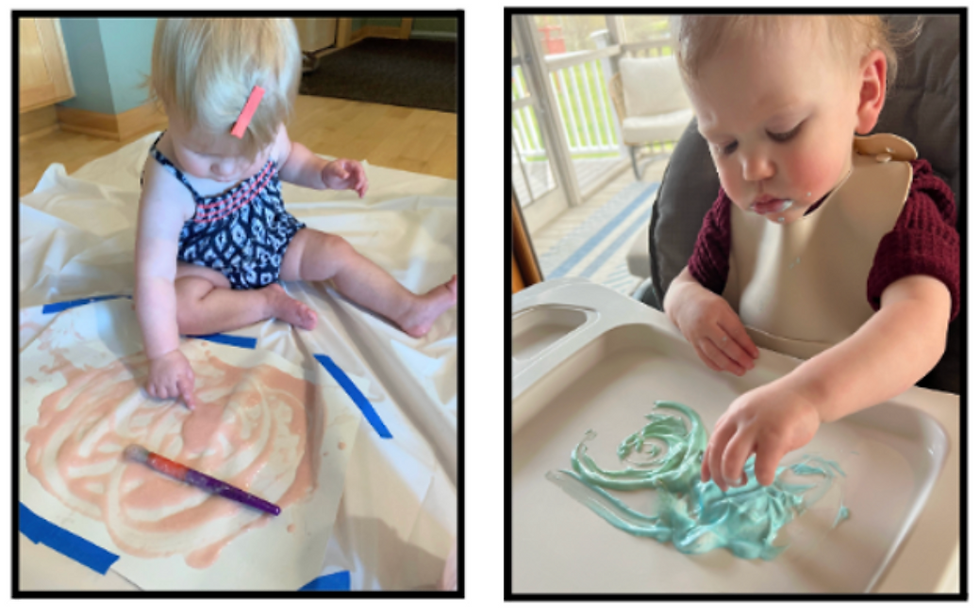
Edible Finger Painting!
Set a big plastic sheet on the floor or have your Little sit at his/her high chair and use the tray! Then find some materials that are safe for babies to put in their mouths. Try rice cereal mixed with beet juice (as shown with Little D) or try pudding or yogurt mixed with a drop or two of food coloring (as shown with Little L). Add plastic silverware or a clean paint brush to push around in the “paint” or simply let them explore with their fingers (and if you are brave enough… their toes)!
Smoosh Painting!
Does the above activity sound too messy for you? If so, try this option! Take a Ziploc bag and put a couple drops of paint in it, or even a few layers of colors. Seal the bag tightly (we even suggest using packing tape to secure the seal) and let your Little smoosh away! NOTE: When your Little gets a bit older you can put a piece of paper in the Ziploc with a few drops of 2-3 colors of paint. Then let your Little smoosh once again to create fun color combinations. Carefully remove the paper when your Little is done creating and let the paint dry. Don’t forget to discard that messy Ziploc!

If you'd like, you could even combine both of the above ideas!
Use edible finger paint in a Ziploc bag.
If it smooshes out - no worries!
Collage Creations!
We love how versatile contact paper is when it comes to Littles’ activities! Any traditional cut-and-paste art activity can be adapted into a glue-free one!
For this sensory project, you’ll need 2 pieces of clear contact paper and a collection of safe materials that your infant can touch.and feel - we found ribbon, yarn, paper shreds and cotton!
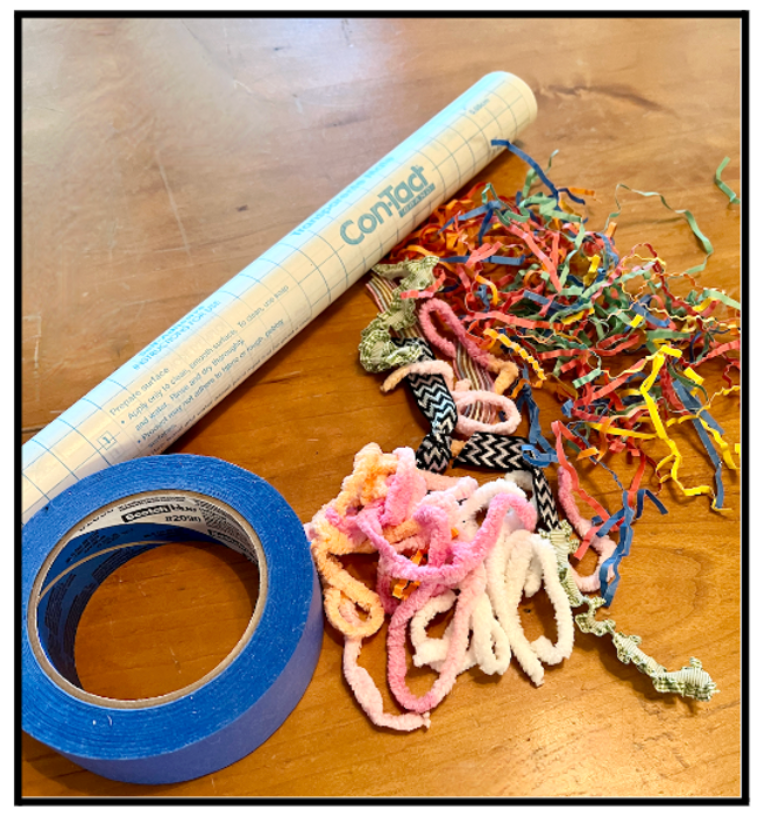
Peel one edge of the protective covering from one of the pieces of contact paper and tape it to the floor, wall or window. Continue to peel it to expose the sticky side completely and tape the edges down. Now the fun begins! Put a few items in front of your Little and talk about each as he/she touches the texture and sticks it to the contact paper! Pat down each object so that it sticks to the contact paper!
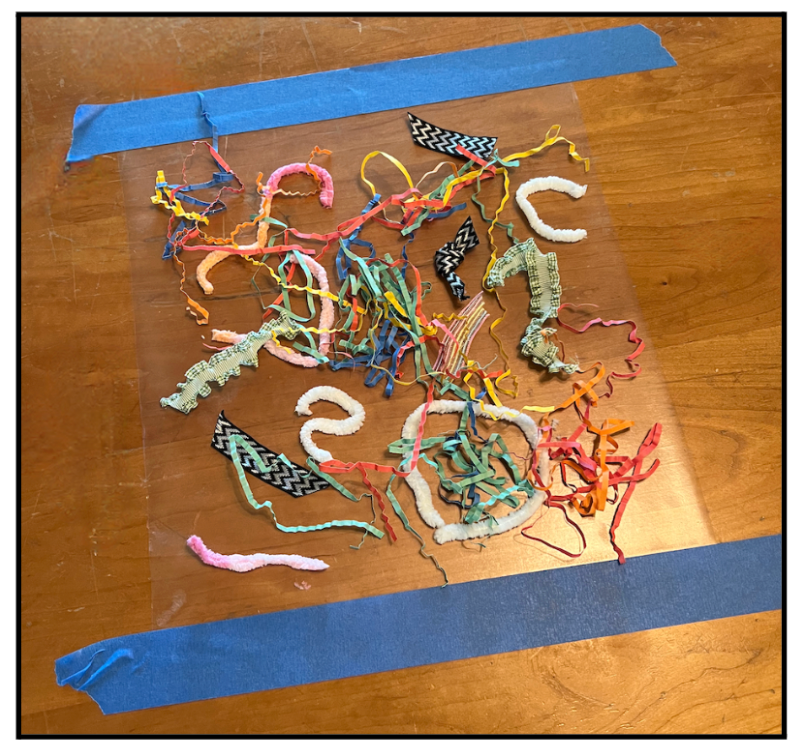

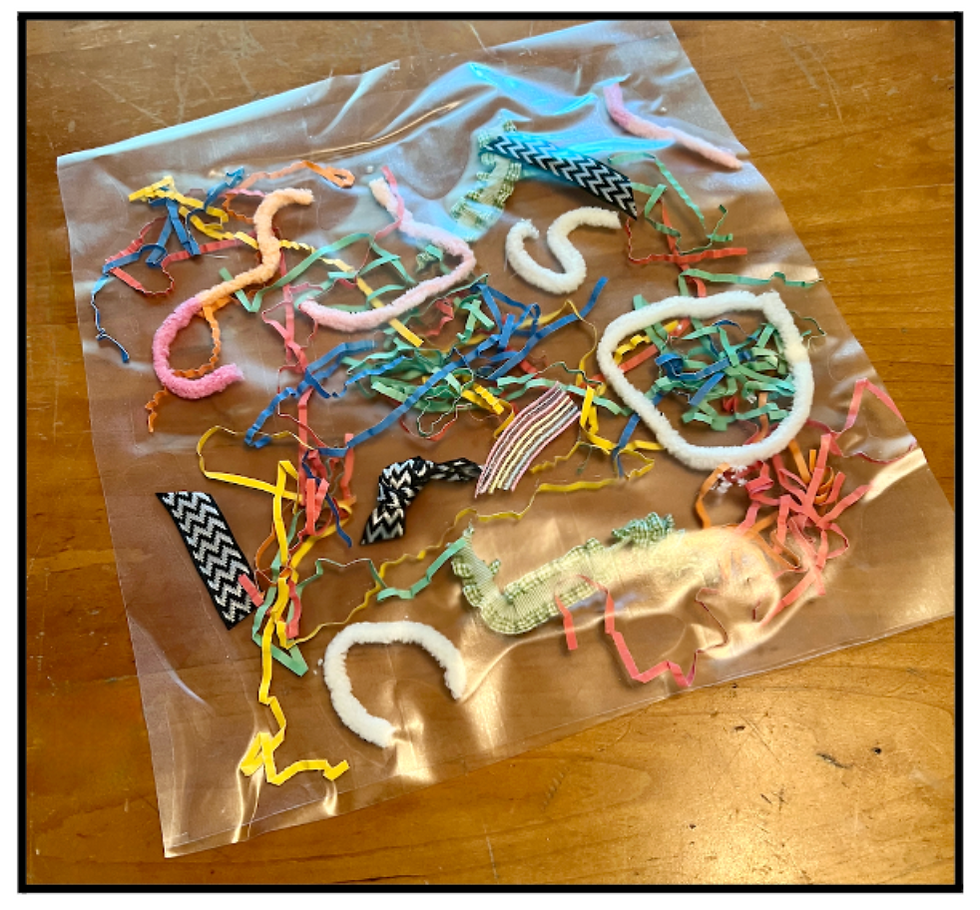
When your Little is finished, put the second piece of contact paper over the first, sticky side to sticky side, to hold the objects in place and to remove that sticky factor! Trim around the edges, as needed. Don’t worry if there are bubbles or that the paper isn’t smooth… remember that the goal is not perfection but exposure and fun! Then watch your Little as he/she checks out the new creation with all its new sights and sounds!
Older Littles (even school-agers) will have fun with this one, too, especially if you adapt it to make it a bit more challenging for them! After taping down the contact paper, give them different colors of yarn remnants and scissors and let them cut pieces of yarn to lay on the sticky paper - it can be free form or they can create a picture as if they were painting it! Don’t forget to add the top piece of contact paper to the finished project!
TODDLER ART!
As your Littles’ skills grow, so can the complexity of the art experiences!

Tape Resist Art!
Take Painter’s Tape and lay it over a piece of paper, as shown below. We found the tape stuck a little too much to construction paper, so if you have tagboard (or cardstock), that might work better. Lay out some paint and paint brushes, and let your Little free paint all over the paper!
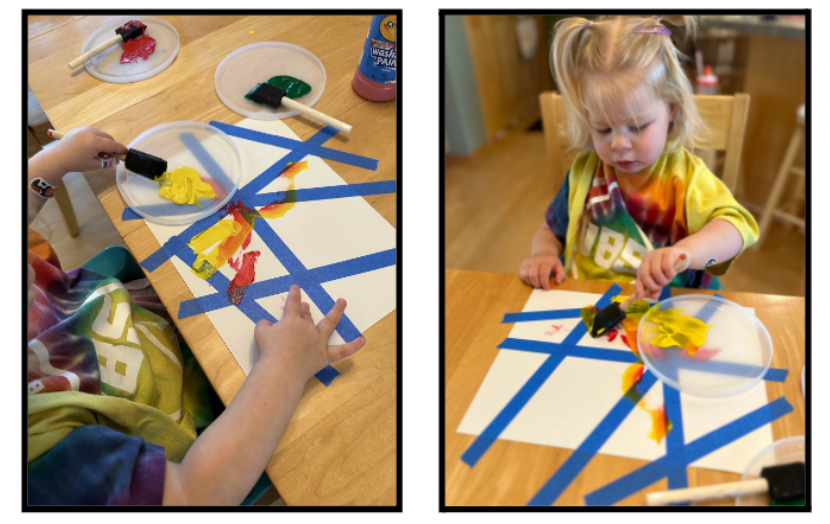
Allow the paint to dry. Then carefully pull off the tape.
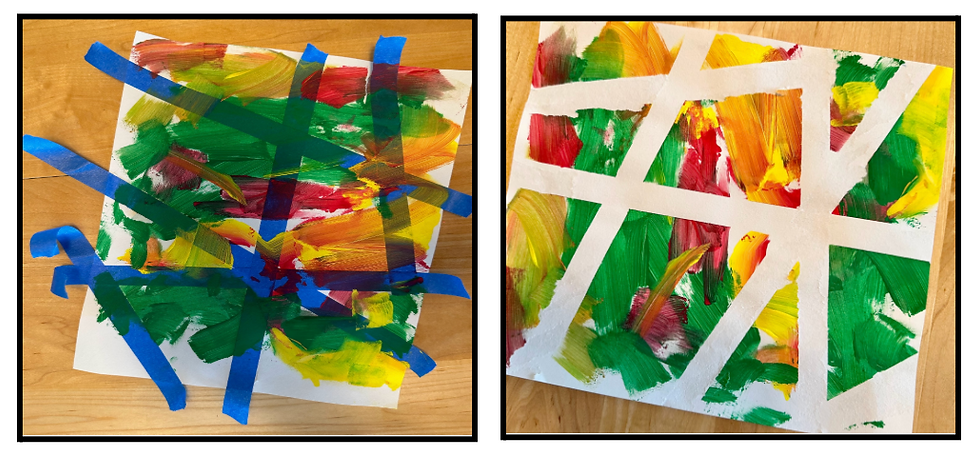
Abstract art at its best!
This year - another version and another Little!
For Valentine’s Day, we made a heart shape with the tape
and then our Little painted away!

Rock Painting!
Rock painting is a fun way to bring nature into your art experiences and, as you’ll be able to tell from Laurie’s reflections, it can be such a meaningful and memorable project, too!

"We have a rock garden in our backyard that started when my own kids were young, and a pet passed away. Through the years we collected flat stones (mostly from Minnesota’s North Shore) and the kids would paint them as a memorial to their pets. (We have had a lot of pets over the years!) In elementary school, they would earn a Peter Pebble (a pretty painted rock) from church when they memorized a Bible verse or a prayer or a skill (such as learning the names of all the disciples). These special Peter Pebbles joined the rock garden as well as other pretty rocks they found and admired. I loved this solution to that age old question, What do you do with all those collections that accumulate in their rooms? Many of the stones and rocks are now faded, but Little D is fascinated with them just the same. She loves to carry them around, and rearrange them in the garden."
During past trips to the North Shore I always pick up a couple of rock for my Littles to paint. Then, any newly painted additions are added to that same garden!
How special is that!

Because of Little D’s age at the time, we used washable paint in the photos above. Eventually, the paint washed away, but then Little D would just paint her rocks all over again!
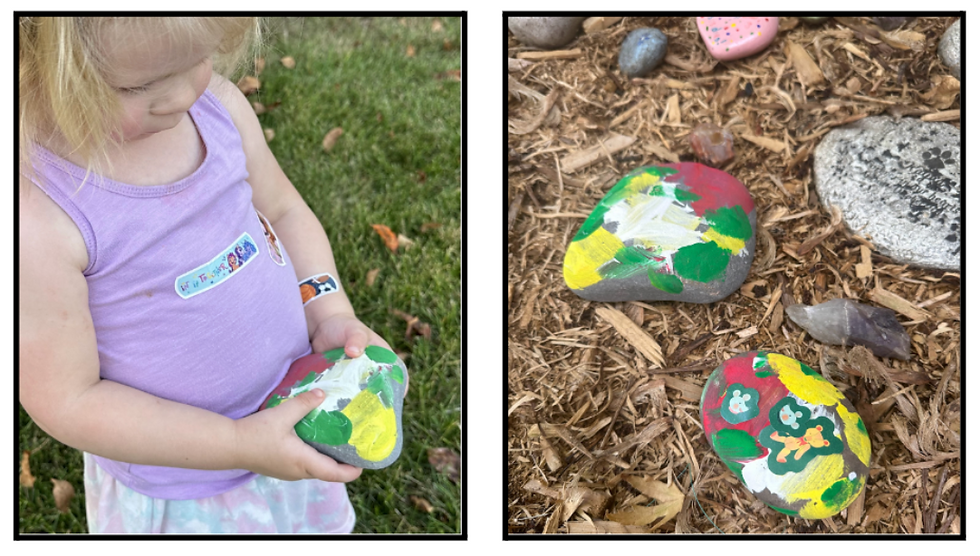
Now that Little D is older (five), we’ve switched to acrylic paint or patio paint for this project.
I hope this is a tradition the next generation
will continue to love and add to
as they (and their collections) grow!
Rainbow Painting!
Over the past few years, we’ve spent tons of time dong a variey of projects at the kitchen counter… Laura’s Littles love their standing towers and we do, too!
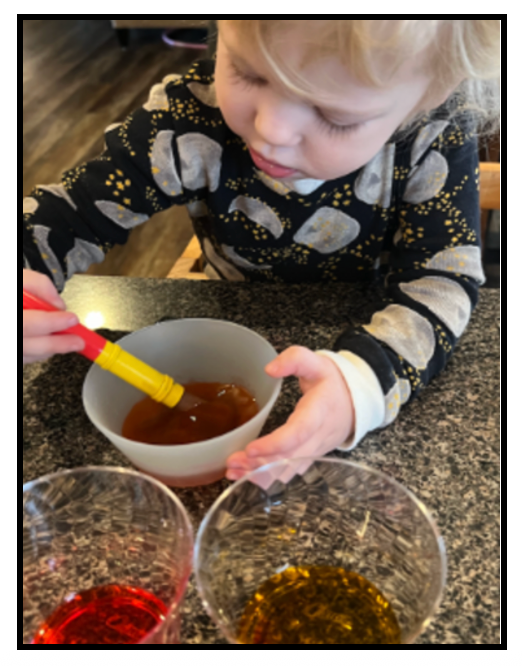
For this simple activity, we added food coloring to water (filling each cup about ⅓ full), let our Little mix each with a paint brush and then provided paper towels for her to paint on!

We also showed her a cup of plain water and showed her how to “clean” the brush…. However, at that point, she wasn’t at all interested! She LOVED painting, mixing colors, putting her brush in all the colors, over and over again!
This activity was definitely on REPEAT!!! Later in the week we started mixing colors and our Little was fascinated!
Process Art with Older Littles!
Through process art, our older Littles (preschoolers and older)
can focus on creating something new!
There is no wrong way to do it so our Littles are free
to explore and make their own decision,
resulting in their own original masterpiece!
Shower Liner Art!
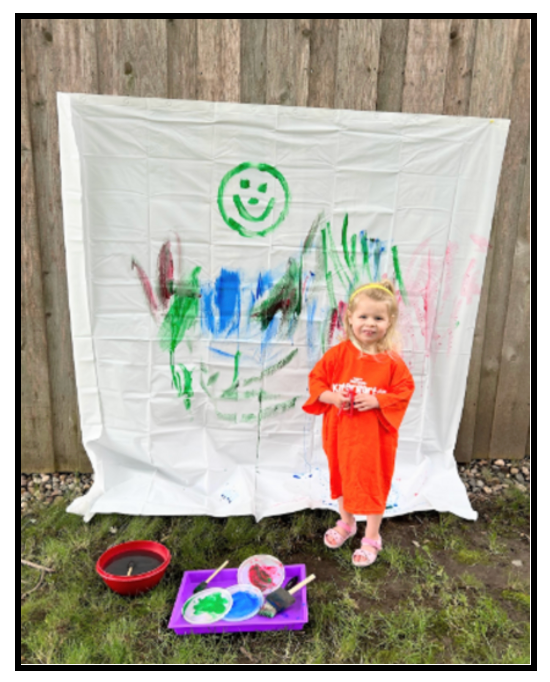
Laurie and her Little D show us a great way to bring the creative side of your Littles outside and into the fresh air!
It’s the perfect activity for a summer afternoon!
MATERIALS NEEDED
• a cheap white or clear shower liner. (I got mine for $3 at Target)
• washable paint
• paint brushes
• pins or tape (to attach the liner - see below)
• a bucket of water to clean your paint brushes
• a hose to clean up!
• a paint shirt (optional)
DIRECTIONS
1. If you have a fence in your yard, that would be a great place to hang your “canvas” with pins or tape. If you do not have a fence, you could tape the shower curtain to your sliding glass door, or hang it from a rope strung between two trees. Be sure to hang it at a good height for your Little(s).
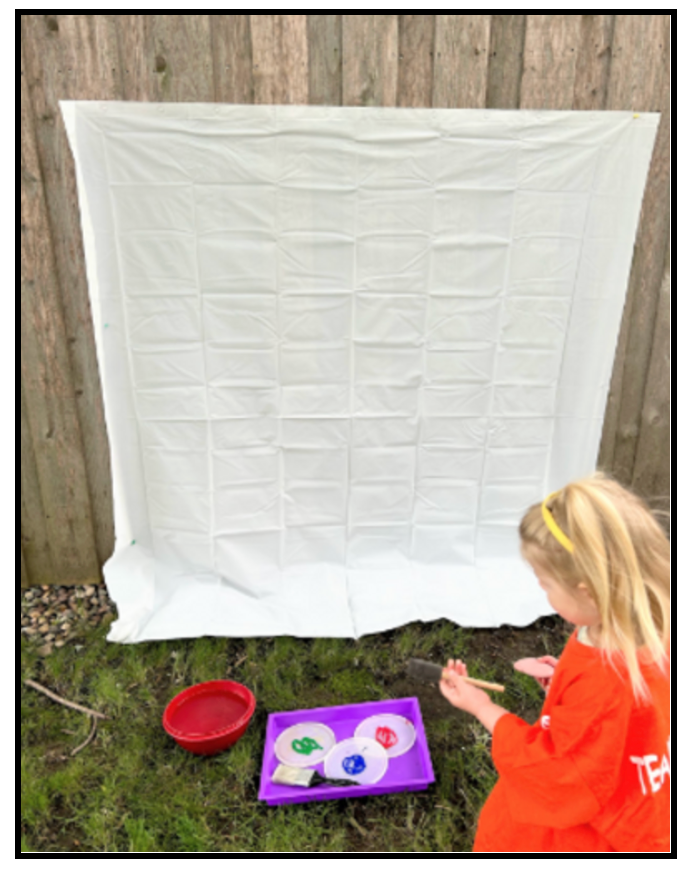
2. Let your Little choose a couple of paint colors to use.
3. Paint away! Older Littles may prefer smaller brushes to make more intricate pictures. However, toddlers and young preschoolers will find this activity fun, too. Just adapt the materials as they will probably enjoy the whole arm experience of creating with larger paint brushes or foam brushes.

The best part?? The clean up!
Use your hose to clean your canvas.
You’re quickly ready for your Little to create a new masterpiece!

Marble Painting!
Have you ever made shaving cream marbled paper? If the answer is “no,” get ready for some extra special fun! We first shared this project a few years ago and it continues to be one we do with our Littles regularly and it never gets old!
You’ll need a shallow baking dish like a pie plate or an 8 x 8 baking dish. You’ll also need some heavy paper (we used cardstock), liquid food coloring, a stir stick (we used a bamboo skewer) and a scraper of some sort (we used a separate piece of cardstock).:
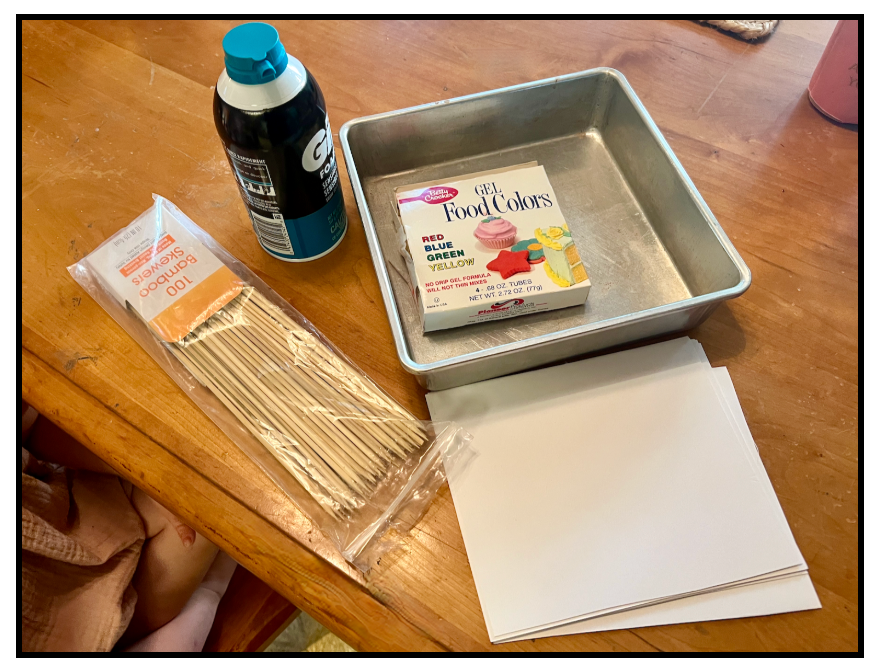
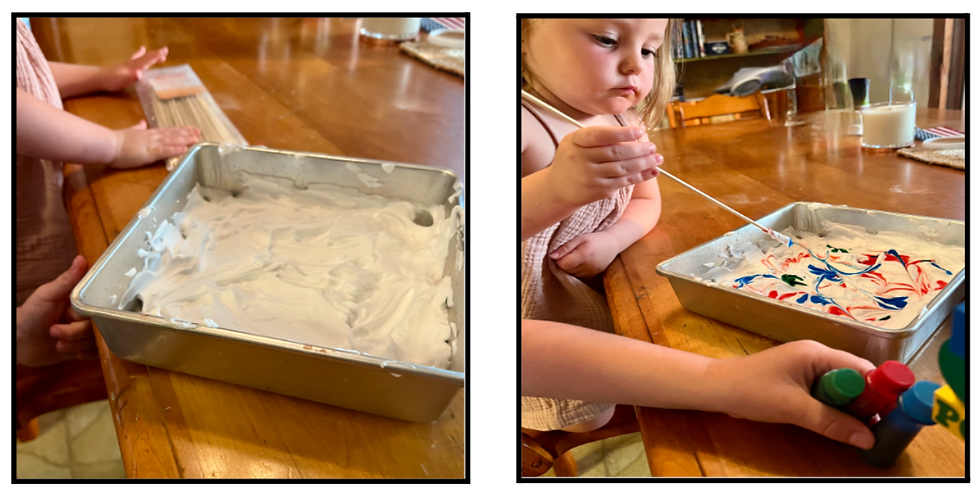
Cut the paper so that it will fit in the baking dish you are using. Spray a layer of shaving cream to cover the bottom of your baking dish. Now it’s time to add color! Your Little can choose 2 colors, adding several drops of each on top of the shaving cream. Next, your Little will use the stir stick (skewer) to swirl the paint around for a marbled look. You may want to demonstrate how to do this and encourage your Little to make swirls all the way to the edge of the pan. At this point, your Little can choose one more paint/food coloring color and, again, add several drops. Swirl once again!
When your Little is happy with the marbling effect he/she sees, it’s time to press the heavy paper onto the marbled shaving cream. Encourage your Little to gently press from edge to edge! Carefully lift the paper up and off of the shaving cream!
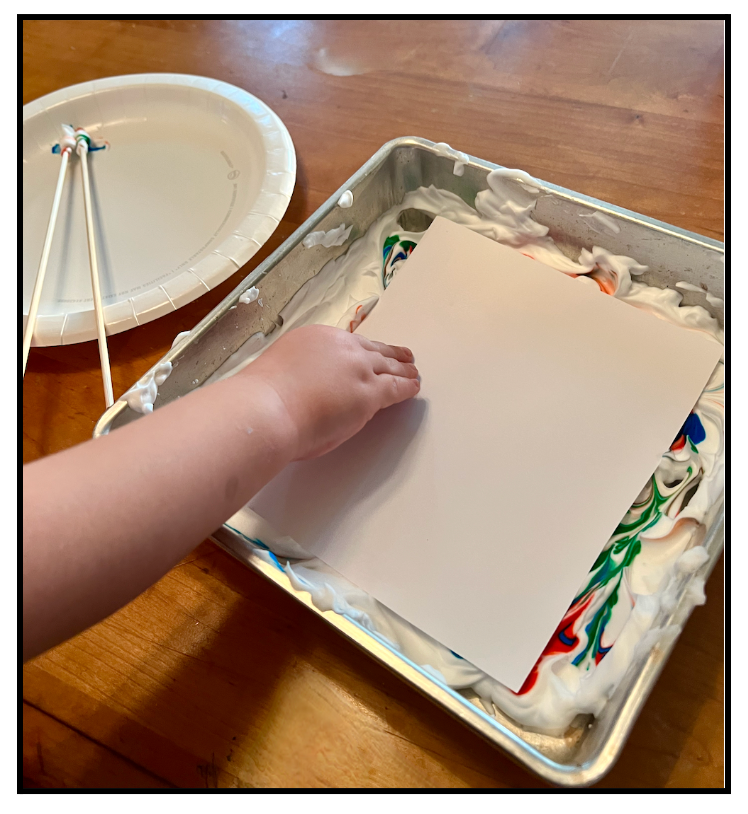
Then use a scraper (or another piece of cardstock) to scrape off the excess shaving cream. Take a look at your beautiful marbled paper! The combinations are endless and your Littles will want to make more and more!
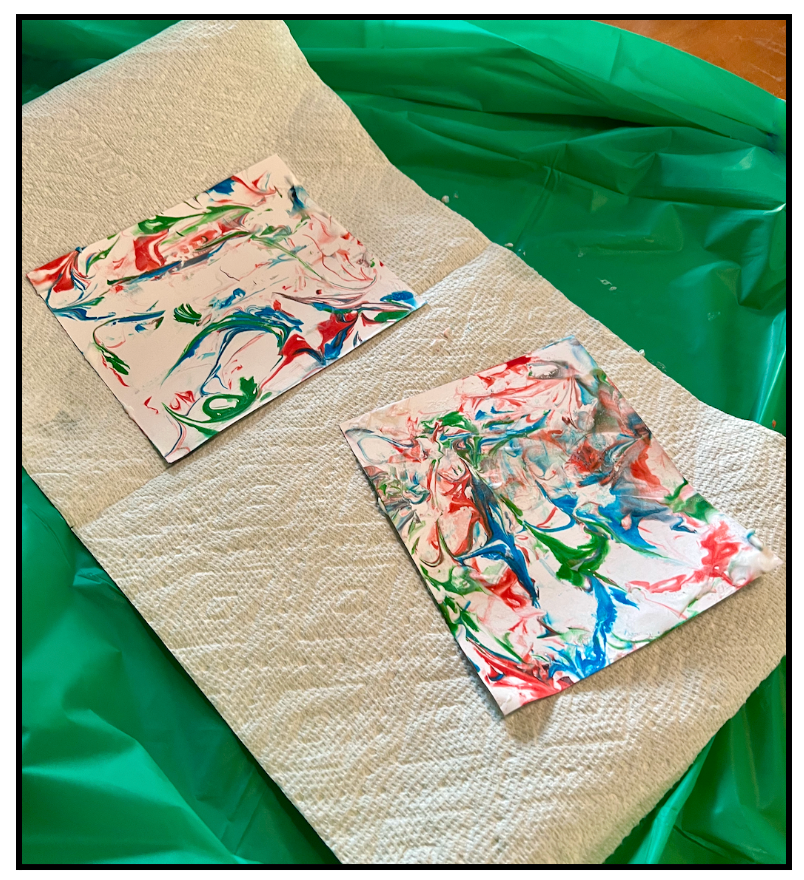
Once your marbled paper has dried
your Little can turn it into a card or cut out hearts to give to loved ones!
Fizzy Paintings!
Recently, when Laura shared the Citrus Volcanos her Littles experimented with, they used the same materials to create some fun art together, too! Enjoy this STEAM activity!

In plastic cups, we mixed water, baking soda and food coloring until it was a consistency similar to paint. We made three colors - blue, red and green.
Our Littles used Q-tips as brushes and painted on white paper. We found that the thicker the paint, the more “fizzing” took place!

Once the Littles were done painting, they were given a cup with vinegar in it and an eyedropper. They added drops of vinegar to the different paint blobs and watched their paintings start to fizz!
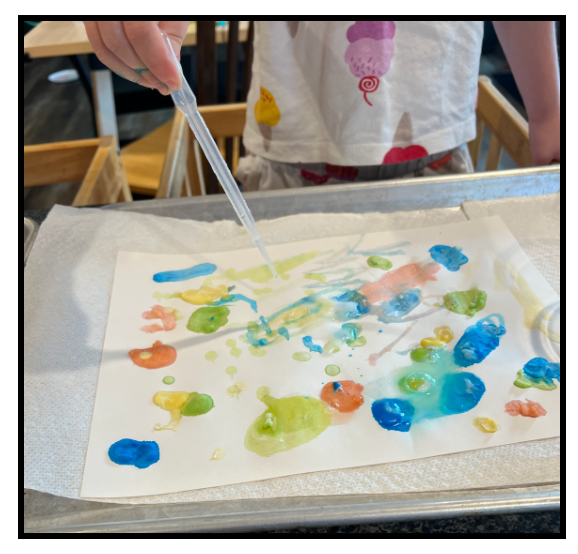
As a Grand Finale to this activity,
we put a piece of paper towel on the bottom of a cookie sheet.
Then, one at a time, we put one of the cups of baking soda paint in the middle of the tray
and we poured vinegar into the cup.
We watched the baking soda paint bubble over!
It made for some surprising - and beautiful artwork!


As GRANDS, displaying our Littles’ artwork shows them how proud we are and how much we value them. If you are a distant GRAND, artwork is a way to keep your Littles close to you and show them you are thinking about them even when they are far away. Below is a picture of Grandpa’s office where Laurie’s Littles artwork is always delivered to be displayed.
NOTE: The artwork is usually displayed at Little height to be seen easier!

We have. a suggestion for you!
If you spend a day, a week or a weekend creating art with your Littles
celebrate all their thoughtful work with
An Artists' Gallery
and invite other family members to stop by!
This is The Artists' Gallery
Laura's Littles created a few years ago after a fun weekend at the lake!
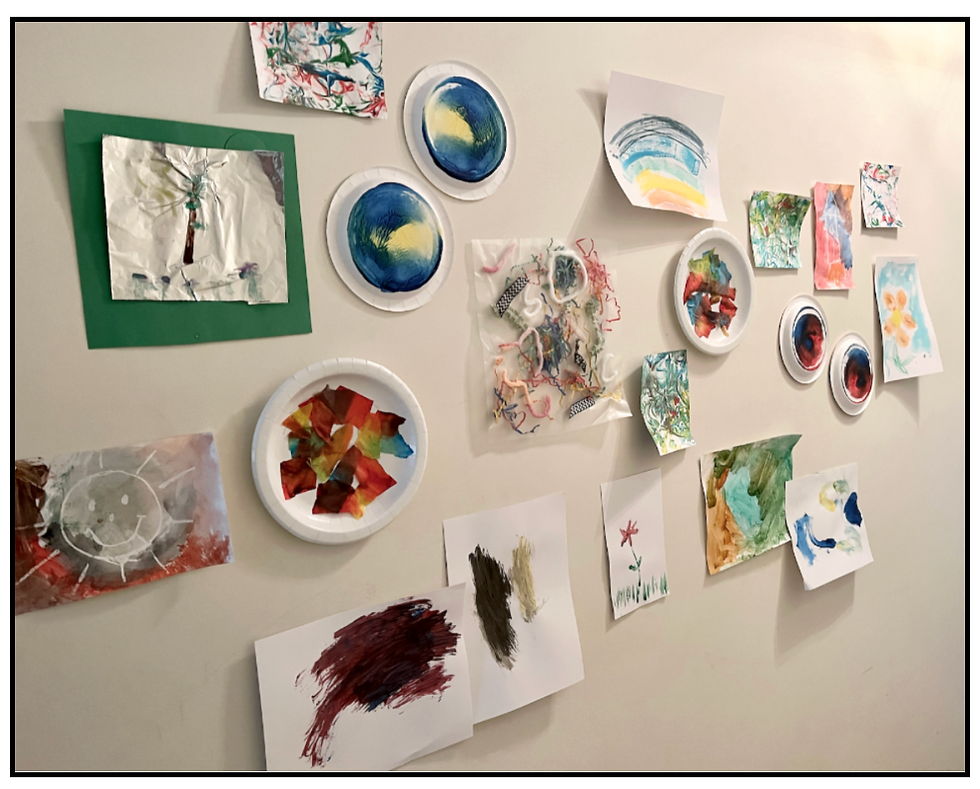
Displaying a child’s artwork builds confidence
as it allows Littles to see, share, and take pride in the work they have created
with the people they love most in the world!
Thanks so much for spending part of your day with us!
It means the world to both of us
and, as much as we love sharing our own ideas with you,
we also love learning from others!
We welcome your ideas, so please share your comments at the end of this post!

Soon we will be wrapping up our summer at Our Grand Lives
and then we'll take a bit of a blogging break!
However, before we do that we have a few more seasonal posts to share
this week and next!
We hope you’ll come back to check out what we have planned!
It’s easy to sign up to subscribe to our blog!
That way, you’ll never miss out when we publish a new post!
We’d love it if you stopped by our social media sites, too!
where we share new ideas regularly!

May the coming week find you savoring the fleeting days of summer
and a glorious sunset or two, too!


SPECIAL THANKS TO THE FOLLOWING SITES FOR FEATURING OUR POST!
Senior Salon PIt Stop from Esme Salon
You are the Star from God's Growing Garden
You are the Star from Butterfly in the Attic
You are the Star from Moms are Frugal
You are the Star from At Home with Lisa Jung
You are the Star from Kris & Larry
Thank you for featuring this post on your sites!
💗 💗 💗
💗 We are delighted to join the following link up parties and blog hops! 💗
MONTHLY
SUNDAY
MONDAY
TUESDAY
WEDNESDAY
THURSDAY
FRIDAY
SATURDAY



So many great ideas to spark the artist in the little ones. I love your sunset photos too!
What a wonderful variety for creating art. I love all these ideas. And beautiful sunset photos, too. Thank you for sharing this with us at the Will Blog for Comments #90 linkup. We hope to see you sharing more at #91 when it opens next Monday. Wishing you a fabulous week.
Thanks for sharing your adventures with us. You will be featured at SSPS on Monday and pinned to Senior Salon Pit Stop InLinkz Linkup Shares
Hi ladies, those sunset shots are fabulous! I always enjoy your creative ideas, so much fun! We once had a white garage wall in our backyard and gave the little ones carte blanche to paint it, they had an absolute ball doing so!
Thanks for the welcome home comment on my recent post!
Debbie debs-world.com
Oh, this is such a wonderful post!! So much fun and joy here and so many wonderful activities!