


hopping into fun! Easter FAVES our Littles love!
- Mar 16
- 8 min read
Updated: Mar 28
Monday, March 16, 2026
It’s Monday, everyone!
Did you have a GRAND weekend?
We certainly hope so!

This joke above felt apropos when thinking about
our topic for today…

However, before we get started,
we do need to add that our weekend was anything but
eggs-hausting or eggs-citing...
unless you count the snow shoveling that regularly took place!
We were pretty much homebound…

The meteorologists were reporting that a record breaking winter storm was anticipated
with snowfalls up to 18”,
so, of course, we were prepared
(and joined everyone else at the grocery store beforehand, too)!
As of now, we’ve only had about 10” in our neighborhoods,
although we've heard that further south got lots more!
Thankfully, it won’t take long until it allmelts!
That’s March weather for you!!!
And, now, switching gears into today’s topic…

As spring begins to unfold and the days grow a little brighter, there’s something special about the anticipation that comes with Easter! One of the sweetest joys of this season is sharing it with the Littles in our lives - our own children, those we care for or teach each day OR, if you’re like us, the grandkids that light up our lives!
This time of year, we’re often called on to provide needed care during days off from school OR we’re looking for an activity or two to keep Littles entertained during an upcoming holiday gathering.
Does this sound familiar to you?
If so, we’ve got a few ideas that could be just what you are looking for! None of the activities we’re sharing are complicated or Pinterest-perfect. However, we can guarantee that each will bring big smiles since these are some of the Easter favorites our own Littles love most!

These time-tested activities are simple ways
to make the Easter season extra fun for YOU and the Littles you love!
A Jelly Bean Rainbow!
Littles of all ages will love this experiment!
Laura has shared this experiment multiple times with her own students and her Sunday school kids, too. During her daughter’s first year as a teacher, Laura visited her second grade classroom and brought all the materials for each student to create their own jelly bean rainbow. It was a hit!

MATERIALS NEEDED
• jelly beans
• small white paper plates (those with a “lip” work the best, as shown)
• a small pitcher or squeeze bottle
• room temperature water
DIRECTIONS
Arrange the jelly beans in a circle around the rim of the dry paper plate, creating a rainbow pattern as you go (red, orange, yellow, green, blue, purple). Repeat the pattern until the circle of jelly beans is complete.

Once the jelly beans are arranged on the plate(s) carefully pour water (room temperature) into the center of the plate. Only pour enough to touch the bottom of all the jelly beans.
Time to observe! Watch closely as the colors start to bleed from the jelly beans and merge into the center of the plate, creating a beautiful rainbow!
SCHOOL-AGE LITTLES will love to take things a step further at home! Use a timer to see how long this process takes. Repeat the experiment, using another liquid (vinegar, hot water, milk) - be sure to use a second plate and new jelly beans, too. Compare any differences in how the colors dissolve or how fast they do so.
Where’s It Hiding?
We’ve all played Memory games with young ones,
but have you thought of using plastic eggs to do so?
With your youngest Littles you can play a simplified version,
where your Little searches for one item hiding under one egg…
Which egg could the star be under?

Then it got a bit harder,
In this instance, our Little did her best to find three pairs
of matching items hidden in the six egg halves!

SUCCESS!
Look at Laurie’s Little D in this Instagram post from last year!
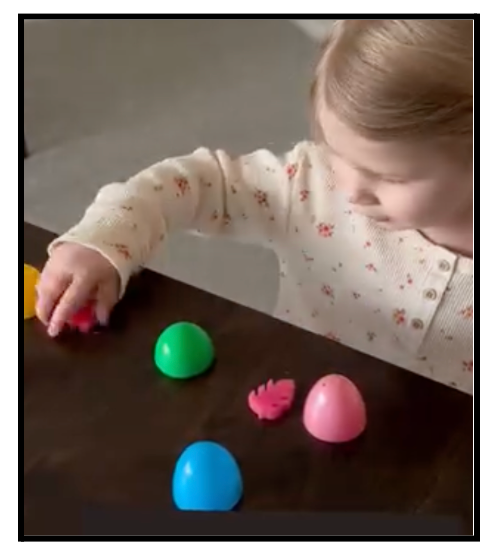
If you watch the video, you’ll see… she’s a whiz!
A Sticky Bunny!
By now, you know how much we love our clear contact paper!
We always keep a roll handy… just in case!
Even toddler Littles can do this project, with a bit of guidance!

Draw an outline of an Easter bunny or an egg shape on the non-sticky side of the contact paper. Cut squares out of colored tissue paper and place them in a container. (You can provide cotton balls, too - you choose.)
Tape the piece of clear contact paper (sticky side out) to the wall or a window. Let your Little(s) decorate the sticky bunny/egg with the tissue paper/cotton balls.
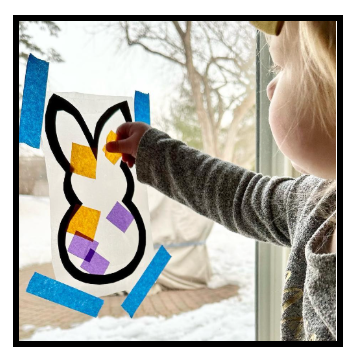
When your Little is done, place another piece of contact paper over the tissue paper. Trim around your shape and hang your Easter art in the window! NOTE: If using cotton balls, do not put another piece of contact paper over your Little’s work.
Going on an Egg Hunt!
No need to wait until Easter for an Egg Hunt.

Laurie’s Littles play Egg Hunt on a regular basis
in the weeks leading up to Easter Sunday!
No prizes! Just smiles and good exercises as we hide and search for eggs!

Happy hunting!
Easter Patterns & Color Sorting!
Here are a few more ways to use a bag or two of plastic eggs!
Creating Patterns!
Last year, Laura found these fun plastic eggs at her local dollar store.

The designs on each egg made these extra fun for building patterns - something 3-year-old Little L was beginning to understand. (We recycled two empty egg cartons to act as the pattern stand!) We’d build a pattern and then clap, snap or tap it out!
First, a simple two-part pattern!

clap - tap - clap - tap - clap - tap and so on!
Then a pattern that had three parts!

clap - tap - jump - clap - tap - jump and so on!
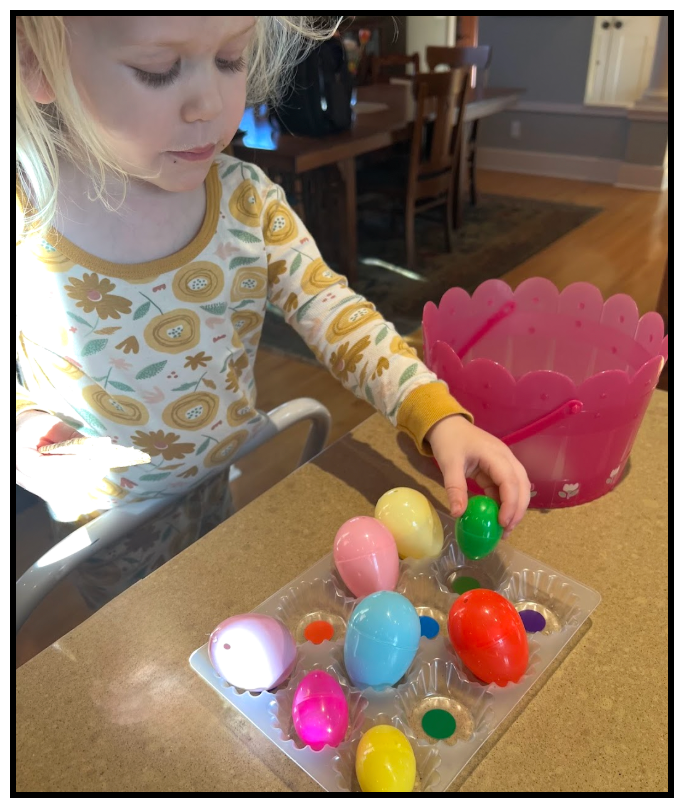
Color Sorting!
We’ve come up with some fun ways to use plastic eggs to help reinforce color recognition, too!
It’s hard to believe this was two years ago…
Little L kept busy matching colors!
All that was needed was one plastic egg in each color,
a large sheet of paper and markers that matched the egg colors.
We drew two dots of each color on the paper
and then our Little got busy matching away.
Here’s another variation from last spring.
We put colored stickers in the bottom of a recycled container
(we love saving and reusing frozen food containers - in this case a quiche tray!)

This year, our younger Littles will find this activity challenging!
Easter Egg Quiet TIme Kit
Our older Littles no longer take an afternoon nap,
but they do benefit from a daily quiet time.

Laura put this kit together for Little L.
It’s a pencil box filled with pom poms, beads and a die
as well as a pair of tongs and a few plastic eggs.
Little L can fill each plastic cup by rolling the die
and putting that many items in an egg!
Peeps Play Dough!
Peeps… you either love ‘em or you're not a fan!

Whether you love that sticky sweetness or not,
did you know that this marshmallowy, sugar topped Easter candy
is the main ingredient in an easy and quick play dough recipe?
When mixed with two other ingredients, you’ll get a colorful play dough…
made in less than five minutes!
You can make this play dough ahead of Easter Sunday and have it ready
as an activity for Littles to play with during your family festivities
OR
you can save a few packages and make it with your Littles as a spring activity!

It’s so easy, we recommend making 2-3 batches at a time
so you have different colors available for your Littles to play with!

INGREDIENTS
• 5 Peeps Bunnies or Chicks (all one color)
• 3 Tablespoons all purpose flour
• 1 Tablespoon solid Crisco
DIRECTIONS
Put all three ingredients in a glass bowl. Microwave for 30 seconds!
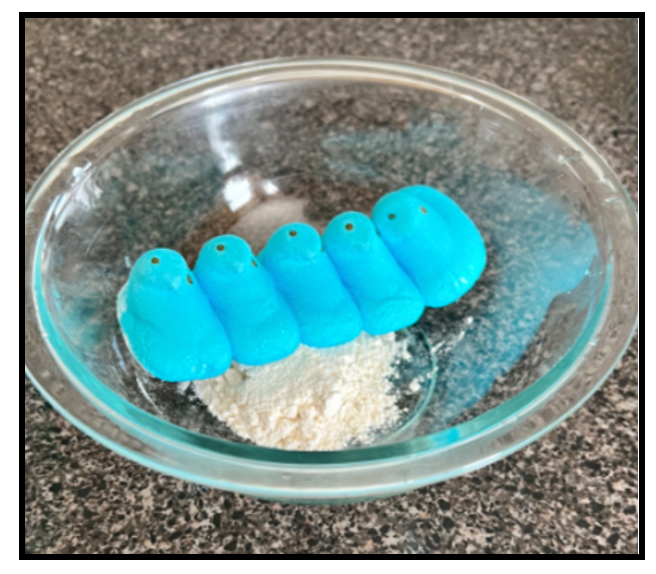


Stir together until a soft dough forms. (At this point you can add food coloring if you’d prefer more vibrant colors; we actually like the spring pastel colors that the Peeps make on their own.)
Let the mixture cool for at least a few minutes (it will be very hot at first). When the dough is cool enough to touch, put it on a clean surface and knead until the dough is smooth and pliable. Knead it into a ball. (If the play dough is too sticky at this point, add a small amount of flour and gently knead again.)
Repeat the above steps for each color of Peeps play dough
that you are making.

Store your Peeps Play Dough in an airtight container or bag for up to 30 days. If it starts to get hard, you can put it in the microwave for 5-10 seconds to soften… your dough will be back to new before you know it!


And… one last Easter favorite - never underestimate…
The Joy Found in a Wind-Up Chick!
Be on the look out for an inexpensive wind-up Easter chick (We got ours at the local dollar store.)! Not only is it a great addition to your younger Littles’ Easter baskets, but it’s a wonderful way to grab those Littles’ attention almost anywhere! You’ll find yourself winding up the toy… over and over again!

Check out this cute video on Instagram!
We hope our ideas help you as you hop into your own fun during the Easter season
and as you create meaningful moments together!

If you have any ideas to share, you know we welcome them!
PLEASE SHARE!
Drop your thoughts in the comments so we can keep on learning and growing!
THANK YOU!

We’ll be back later this week
when we'll pause and look at Easter through the lens of Holy Week.
We'll explore simple ways to share our faith with the Littles in our lives.
Watch for this special post,
Walking Through Holy Week with Our Littles!
We’d love to have you join us.
In fact, you may want to subscribe to our site,
so you don’t miss a thing!
And, of course, you can always find Laurie sharing something new
We’d love it if you stopped by!
We’re so grateful for the Littles who fill our days with wonder
and for YOU, our wonderful readers,
who journey along with us here!

Wishing you joyful moments, happy hearts, and plenty of sweet time together
as you prepare to celebrate Easter with those you love!


SPECIAL THANKS TO THE FOLLOWING SITES FOR FEATURING OUR POST!
Wonderful Wednesday Blog Hop from This is My Everybody
A Morning Cup of Joe from The Cottage Market
Thank you for featuring this post on your site!
❤ We love our blogging community! ❤
💗 We are delighted to join the following link up parties and blog hops! 💗
MONTHLY
SUNDAY
MONDAY
TUESDAY
WEDNESDAY
THURSDAY
FRIDAY
SATURDAY


Thanks L&L, some great ideas here and I'll be trying the jelly bean rainbow one with my grandchildren over the holidays!!
Debbie
I just don't have the energy for these things anymore, our granddaughter has a 2 second attention span and our grandson is so far away. We are going to an Easter party at a lcoal village hall that my friends daughter organises in our old neighbourhood near where our granddaughter lives so we'll meet there and I'll help with the set up and tidy away. We actually have sunshine here the past few days and I haven't worn a coat all week, but I suspect we are being fooled with a false spring, it's still not too late for snow. Thanks for joining in with #pocolo
Such cute Easter ideas, especially the Peeps (we don't have them here and I never even got the chance to try them myself). Have a lovely weekend.
We had 70s on Sunday, and I woke up to low 20s and snow on Monday. It's been cold for the last few days. I'm ready for spring! I love Peeps and would hate to waste them on play doh, but what a cool thing to do!
https://marshainthemiddle.com/
All wonderful ideas...We had thunderstorms and rain and then the temps. dropped 30 degrees in about an hour and the rain turned to ice and snow...Crazy!! Thanks so much for all your visits and your sweet and encouraging words!! I so appreciate it!!
Hugs,
Deb
Debbie-Dabble Blog