


simply GRAND recipes! wickedly easy Halloween faves!
Friday, October 16, 2026

Here in Minnesota, we are celebrating the beauty of the season
as fall’s splendor is all around us!
Laura and her husband just returned from their annual trip
to the North Shore of Lake Superior!

What can we say?
Our week was simply Grand!
This beautiful autumn weather makes us wonder if the coming Halloween night
will be unseasonably warm
OR if, as per usual,
our Littles will be bundled up with coats, hats and mittens
as they trick or treat!
Hmmm? Only time will tell!

Of course, we also find ourselves reminiscing about our very own Littles
and past Halloween celebrations…

Cherished memories, indeed, for these two Grands!
This month, we're gathering some of our favorite Halloween-inspired eats and treats
in our Simply GRAND Recipes! series.
From creepy-cute creations to delicious bites that everyone will love, these ideas are perfect for sharing with family and friends. So, invite your Littles into the kitchen, let your imaginations run wild, and get ready to cook up a little Halloween magic!

Halloween is the perfect excuse to have a little fun in the kitchen!
Whether you're planning a spooky supper, putting together a festive snack,
or whipping up a sweet treat for your favorite ghosts and goblins,
a few simple recipes can make the season even more special.
And the best part?
No fancy ingredients or hours in the kitchen required!
In fact, many of our ideas wouldn’t technically be considered recipes!
Sometimes, all it takes is a little imagination to transform
everyday favorites into something spooktacular!

Hot Dog Ghosts are a fun Halloween twist
on classic pigs in a blanket or mummy dogs!
Crescent dough wraps around upright hot dog halves,
and little cutout faces transform them into spooky snacks
that are sure to delight your Littles
INGREDIENTS
• 4-8 hot dogs
• 1-2 packages of Crescent Rolls
• ketchup and mustard, for serving
NOTE: 1 package of Crescent Rolls and 4 hot dogs makes 8 Hot Dog Ghosts

DIRECTIONS
1. Preheat the oven to 375°F and line a baking sheet with parchment paper.
2. Cut each hot dog in half, making the cuts as level as possible so each piece can stand upright on the baking sheet. Stand the hot dog halves upright on the parchment-lined baking sheet, with rounded ends facing up.

3. Unroll one package of crescent rolls and press any perforations in the dough together. Cut the dough into eight rectangles. Repeat with the second package of crescent rolls. Drape one dough rectangle over each hot dog.

Use a straw to create eye and mouth holes, as shown below.

4. Bake until golden brown, approximately 11-13 minutes. Serve with ketchup and mustard.

Laura made these with her Littles recently and served them with Mac and Cheese Jack-o-Lanterns! We followed the directions on a box of mac and cheese, and then scooped it into
plastic glasses we’d decorated with a black permanent marker to look like jack-o-lanterns.

We added a celery stick at the top to look like the jack-o-lantern’s stem!

Simply Grand!

This is a great way to dress up your veggie tray for Halloween!
It will be a hit with your Littles - especially your school-aged ones!

INGREDIENTS
• a small pumpkin
• your favorite veggie dip (Laurie’s favorite recipe follows below!)
• a variety of vegetables (carrots, celery, cucumbers, peppers and more!)
DIRECTIONS
1. Carve a jack-o-lantern from a small to medium sized pumpkin. Thoroughly clean out the inside of the pumpkin, as well. Be sure to make your jack-o-lantern’s mouth big!
2. Spoon your favorite veggie dip into the mouth of the jack-o-lantern and then add more and spread it out around the outside of the mouth of the pumpkin so that it looks as though the pumpkin is “throwing up”. Add your clean and sliced veggies around, as shown above!
Laurie’s Favorite Dill Dip!

This is the dill dip recipe made famous by my mother-in-law. We have it with veggies almost every time my husband’s family gets together and my family calls it Shirley’s Dip. The above card is written in her printing which, of course, then makes it extra special for us all since she is no longer with us!
We have made a slight change, though... We only use 2 ½ tsp. of Lowry’s Seasoning Salt because otherwise it tastes too salty for our family. All we do is dump all the ingredients in a bowl and mix together!
Two more GRAND ways to display a Halloween veggie tray!
This Pumpkin Tray is a great alternative, especially for young Littles! Use our photo as inspiration and feel free to get creative with the veggies you include and then, as a final touch, add small bowls of dip or hummus for the eyes!
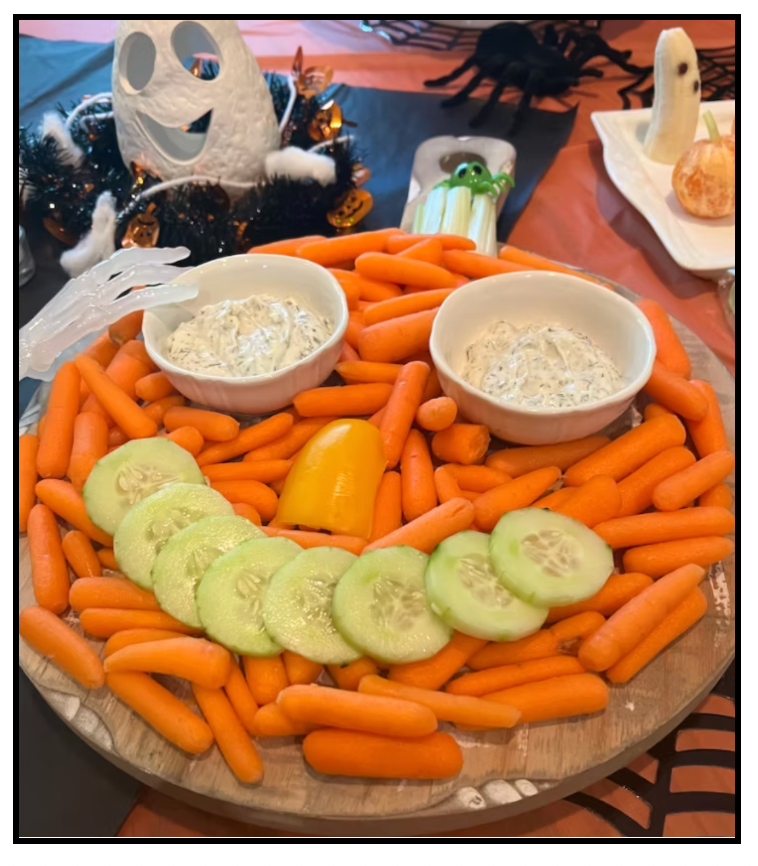
The Skeleton Veggie Platters photographed below are another fabulous option! Your older Littles will love putting these together! (Did you notice that the skeleton faces are bowls of dip with veggie features!

Simply Grand!

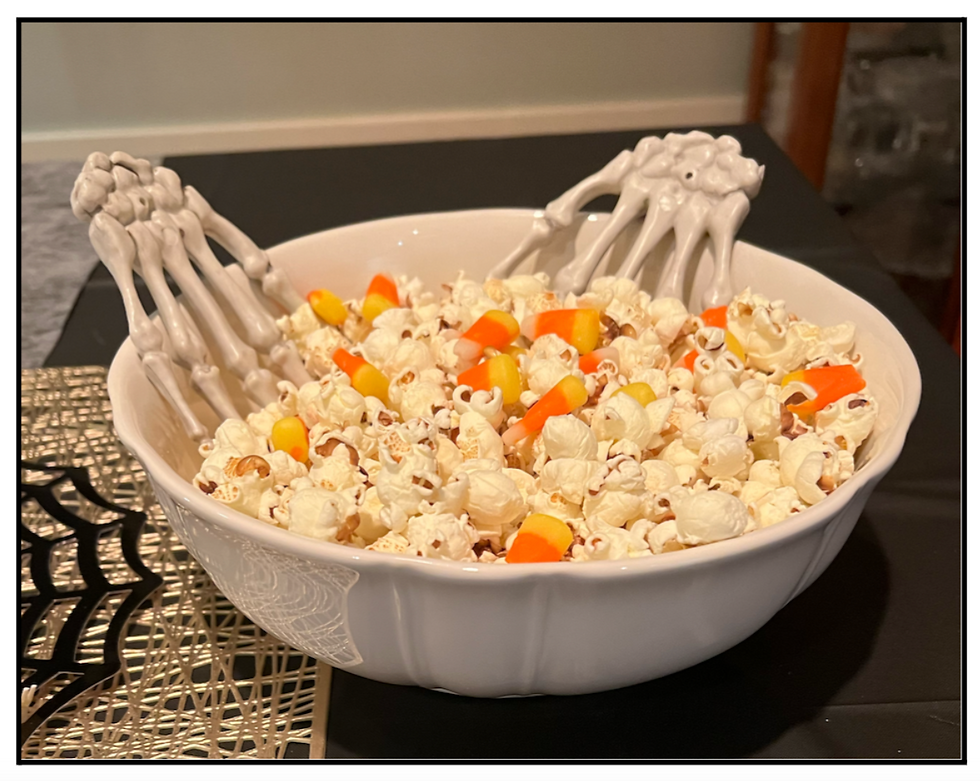
How’s this for easy peasy?
We filled a bowl with popcorn and sprinkled in some candy corn for good measure!
You could add candy eyes, black and orange M & M's
or Halloween sprinkles for extra fun!
We added a pair of fun skeleton scoopers to create a festive atmosphere!
Simply Grand!

Since we started this blog, we’ve shared several simple Halloween nibbles here!
Below, you’ll find a few of our faves!
Donut Spiders!
Laura and her Littles first had these at a neighborhood bakery.
They were so easy to recreate…
They’ve become a yearly favorite!

You’ll need donuts, pretzel sticks and chocolate chips or raisins. That’s it! Our Littles love the cinnamon sugar or apple donuts found at a nearby apple orchard so that’s what we start with. Then we add eight pretzel spider legs (four per side) and we add chocolate chips or raisins for the spider’s two eyes and mouth.
Boo Bananas & Clementine Pumpkins!
Several years ago, when we still hosted annual Halloween parties in our kindergarten classrooms, we’d try our best to serve healthy snacks. These were both favorites! These days both are fun ways to get some fruit into an October meal!

Peel bananas and Cutie clementines. Cut each banana in half and add mini chocolate chips as eyes and a mouth to each. Add a stem from a small stick of celery to the top of each clementine to turn them into pumpkins! Place both on a tray… your Littles will love making and eating these!
Cheese Broomsticks!
These quick cheese and pretzel broomsticks make a fun addition to any Halloween menu! They are also a fun option to prep and serve these at a class party, too! You'll only need 3 ingredients - cheese sticks (any kind), pretzel sticks and chives, which are optional, but add a delicious flavor. Your older Littles will love constructing these with you!

Cut each cheese stick into 3 sections. Using a knife or a kitchen shears, slice vertical lines up the bottom of each cheese section (to look like a broom). Cut about halfway up each cheese section. (OPTIONAL - At this point you can tie a chive in a knot around the base of the cheese stick and knot it, We found that the chive broke easily so we only made half with them as you’ll see..) The last step is to attach the broom handle (a pretzel stick) to the top of the cheese broom!

Creepy Brains Pasta!
Laura’s Littles love it when she makes this easy main dish in October!
Plus... It makes great leftovers, too!

INGREDIENTS
• radiatore pasta (rotini would also work)
• your favorite spaghetti sauce
• mozzarella balls OR pearls
• sliced black olives
NOTE: We know that not all Littles are adventurous eaters and may not want to eat the black olives. Thankfully, they are easy to remove once your Littles have seen the eyeballs… And who knows - maybe they’ll even give an eyeball - or two - a try!

DIRECTIONS
1. Cook the pasta as outlined on the package. In fact, we like to cook ours a bit longer until it’s soft, resembling mushy brains! 🥴 Drain the pasta and return to the pot.
2. Add spaghetti sauce to the pot of pasta. Mix the pasta and sauce together and heat the mixture until it’s cooked through. Spoon pasta mixture into a serving bowl or into individual bowls to serve.
3. While the pasta is cooking, place mozzarella balls on a paper towel to drain off excess liquid. Place a slice of ripe olive in the center of each mozzarella ball to mimic an eyeball.
NOTE: Once I’d assembled these, I put them in the microwave for about 20-30 seconds so that they’d slightly melt together. Set these aside until the pasta with sauce is ready to serve!

Place several of these eyeballs in a serving bowl filled with the pasta OR add a few of these to each individual bowl of pasta!


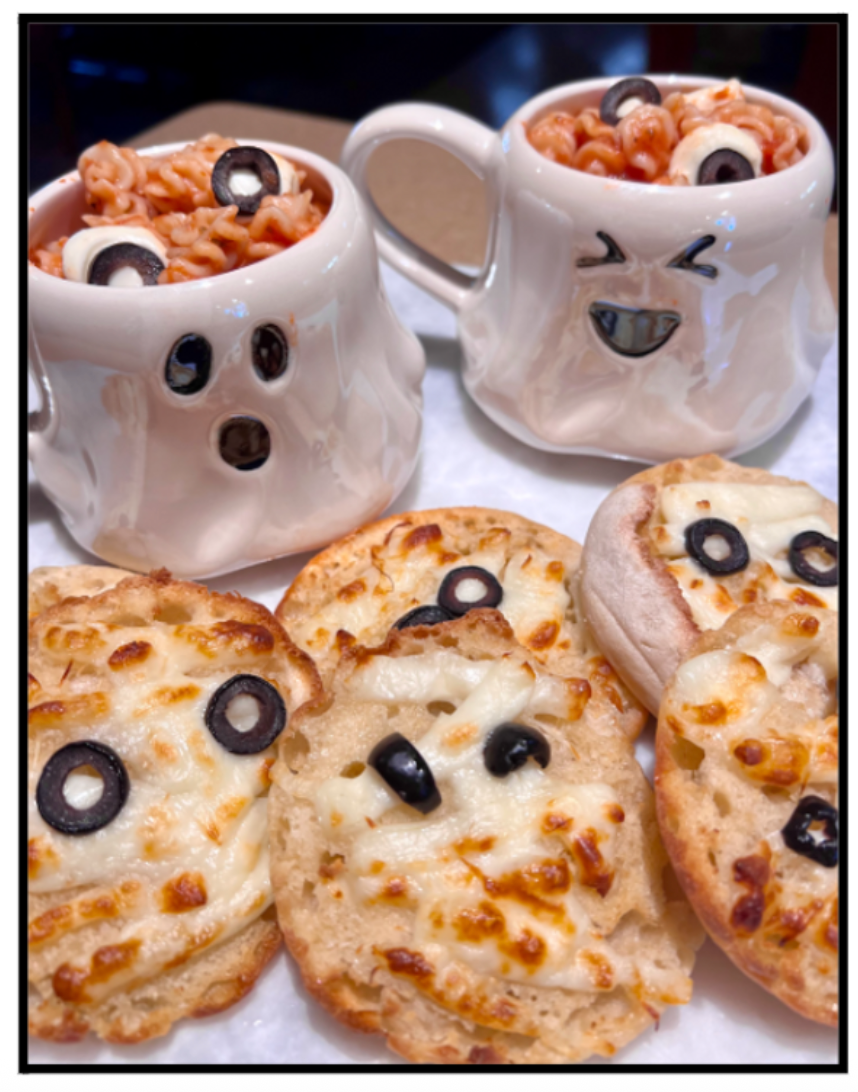
Mummy Garlic Bread!
This is also a favorite among Littles
and many love creating their own mummies in preparation!
As you can see, it's a great side dish for our Creepy Brains Pasta!
INGREDIENTS
• English muffins, split in half
• butter, softened
• garlic (or garlic powder) to taste
• string cheese
• sliced black olives

DIRECTIONS
1. Preheat your oven to 350 degrees. Place English muffins that have been split in half on a parchment lined cookie sheet or sheet pan. (The crevices of the English muffins add to the mummy mystique!
2. Combine the softened butter and garlic. (We adjust the amount of garlic we use, depending on our Littles’ taste.) Spread this mixture onto each English muffin half.
3. Pull the string cheese apart and add strips to each English muffin to represent the mummy bandages. Add two ripe olive slices for each mummy’s eyes!

4. Bake for 8-10 minutes, until the cheese melts! We put our mummies in the air fryer for a few minutes for an extra spooky touch!

Spider Brownie Bites!
This dessert requires little explanation…
And your own Littles will be delighted with the results!
Check out the photo below to see what the final product looks like!
Laura purchased brownie bites at our local grocery store but you can certainly make your own brownies and cut them into squares or into circles. You will also need pretzels (not sticks) and a small bag of Skittles or M&M’s candies.

Using a knife, carefully cut the pretzels into curved sections. Do this to several pretzels (you’ll need 8 curved sections for each brownie bite). Push the pretzel sections into the brownie, four on each side of the brownie. Then, choose 2 Skittles or M&M’s that are the same color and, depending on the size of your brownies, either press the two candies into the brownie bite or “glue” them on with a small dollop of frosting. (We simply pressed ours on and while they quickly fell off when picked up to put on a plate, that actually added to the silliness of the day!)

We’d love to hear your thoughts and ideas on today’s recipe!
Please share your comments at the end of this post!
We’ll be back early next week with a new post,
Grand Candy Games Your Family Will Love!
Many of us will find ourselves with extra wrapped candy once Halloween is over,
so we’ll be sharing a few fun ways to make good use of those extra bags!
If interested, it’s easy to sign up to subscribe to our blog!
That way, you won’t miss out when we publish a new post!
Remember, too, most weeks, you’ll find us posting additional content on
We’d love to have you follow us there!

A little spooky, a little simple and always delicious…
For us, that's what Halloween food is all about!
Whether you're whipping up a frightfully fun snack, sharing a sweet treat
or simply finding a creative way to make an everyday favorite feel special,
we hope our Simply GRAND ideas inspire you
to have a little fun in the kitchen with your Littles.
After all, the best Halloween memories aren't always about the tricks or the treats,
but the laughter, love and little moments you share along the way.
So go ahead,
make something fun, make something delicious and, most of all,
make some memories!

💗 We are delighted to join the following link up parties and blog hops! 💗
MONTHLY
SUNDAY
MONDAY
TUESDAY
WEDNESDAY
THURSDAY
FRIDAY
SATURDAY


You have so many cute and delicious ideas here.
The snacks are all so cute! I think my favorite are the ghosts, but I also love the spiders.