


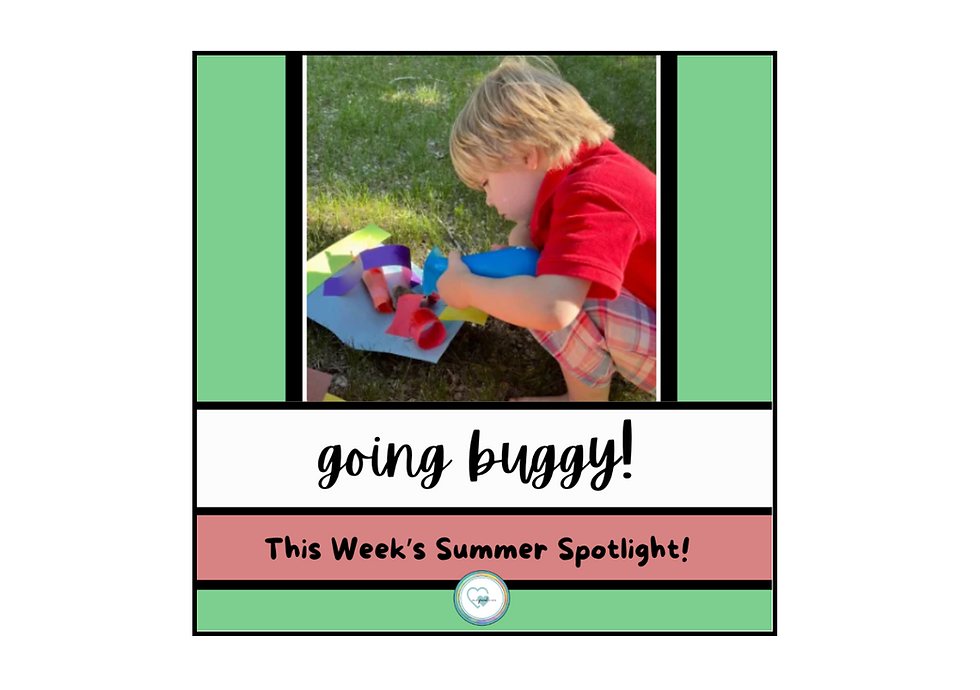
Art-a-Whirl! Summer Camp with the Grands!
- Aug 8, 2023
- 12 min read
Updated: Aug 6, 2024
Tuesday, August 8, 2023
There’s nothing like a summer sunset
and our weeks have been filled with them lately…
like this one that Laura’s hubby captured at the lake recently!

What a blessing each one is at the end of a hot summer day!

Yes, God’s artwork inspires us all!
Art is a way to express our emotions and feelings
and it helps us understand our world.
Art can be used as a form or self-expression
and as a way to communicate with others!
When we create art we open our mind to new ideas,
we find new ways to problem solve and we find JOY!
In this week’s post we highlight a variety of ways
to share art experiences with our Littles,
our grandkids, our own children or others in our care!
What fun to discover creative, messy JOY together!


Have you ever wondered what the difference is between art and crafts? To understand the difference for Littles, it is helpful to think of art as open-ended with no clear outcome and the focus is on the experience and the process. In comparison, crafts have an ultimate goal in mind and are more project based and often driven by a teacher or other grown up. Both art and crafts offer learning opportunities that are valuable for our Littles.
In this post, however, we are focusing on art experiences we can share with our Littles - open-ended activities that place an emphasis on the creative process rather than a finished piece. Such experiences provide opportunities for our Littles to learn a variety of new skills, expose them to a wide range of art tools and, above all, help them celebrate the uniqueness of their own artwork as opposed to trying to recreate a model to perfection!
Are you ready to get the creativity flowing?

Process and open-ended art experiences
allow our Littles to practice fine motor skills, observation skills,
self-regulation and confidence!
One of the best things about embracing process art
Is how truly easy it is to set up!
Often, you just need to provide the materials
or even let your older Littles find/choose their own!
We hope you find the experiences we’re shared here
helpful, fun and doable,
since many include supplies found in your own home!

It’s never too early to do art with our Littles!
Babies are curious and eager to explore their surroundings!
When our littlest Littles engage in creative art activities, it is a whole body experience! In fact, they are often more likely to be interested in grasping, chewing, pounding, squishing and even tasting than they are in trying to actually create something.! Creating art with your infant Littles engages so many of their senses and by doing this, they are learning about the world around them! ♥
We’ve found that with a little bit of creative planning, many art experiences can be adapted and used with our infant Littles!
For success, keep these suggestions in mind!
🎨 Make It Bigger!
Instead of a small paintbrush, use a large sponge pad! Supersize your art by swapping out smaller pieces of paper with a big roll of craft paper!
🎨 Keep It Down Low!
Figure out how a project can be adapted and moved to the floor or the high chair so that it’s more accessible for your Little! Don’t forget to protect the area by covering it with plastic (an old tablecloth works very well)!
🎨 When Possible, Make it Edible!
Read on for an idea of how we’ve done this in the past! Above all, be sure that all the materials you are using are safe for your Little’s mouth!
🎨 Make Memories Together!
Don’t stress and keep it simple! The real masterpiece will be watching your Little explore, develop his/her curiosity and have fun with hands-on activities!
Here are a few of the fun ways we explored art with Little D and Little L
when they were younger!
EDIBLE FINGER PAINTING!
Set a big plastic sheet on the floor or have your Little sit at his/her high chair and use the tray! Then find some materials that are safe for babies to put in their mouths. Try rice cereal mixed with beet juice (as shown with Little D) or try pudding or yogurt mixed with a drop or two of food coloring (as shown with Little L). Add plastic silverware or a clean paint brush to push around in the “paint” or simply let them explore with their fingers (and if you are brave enough… their toes)!

SMOOSH PAINTING!
Does the above activity sound too messy for you? If so, try this option! Take a Ziploc bag and put a couple drops of paint in it, or even a few layers of colors. Seal the bag tightly (we even suggest using packing tape to secure the seal) and let your Little smoosh away! NOTE: When your Little gets a bit older you can put a piece of paper in the Ziploc with a few drops of 2-3 colors of paint. Then let your Little smoosh once again to create fun color combinations. Carefully remove the paper when your Little is done creating and let the paint dry. Don’t forget to discard that messy Ziploc!

COLLAGE CREATION!
We love how versatile contact paper is when it comes to Littles’ activities! Any traditional cut-and-paste art activity can be adapted into a glue-free one!
For this sensory project, you’ll need 2 pieces of clear contact paper and a collection of safe materials that your infant can touch.and feel - we found ribbon, yarn, paper shreds and cotton!

Peel one edge of the protective covering from one of the pieces contact paper and tape it to the floor, wall or window. Continue to peel it to expose the sticky side completely and tape the edges down. Now the fun begins! Put a few items in front of your Little and talk about each as he/she touches the texture and sticks it to the contact paper! Pat down each object so that it sticks to the contact paper!

A Grand Tip!
Don’t overwhelm your Little by putting all the items out at once…
only offer one or two at a time!
Your Little’s senses will be stimulated as he/she takes time to touch each texture!
When your Little is finished, put the second piece of contact paper over the first, sticky side to sticky side, to hold the objects in place and to remove that sticky factor! Trim around the edges, as needed. Don’t worry if there are bubbles or that the paper isn’t smooth… remember that the goal is not perfection but exposure and fun! Then watch your Little as he/she checks out the new creation with all its new sights and sounds!

OLDER LITTLES (even school-age) will have fun with this one, too, especially if you adapt it to make it a bit more challenging for them! After taping down the contact paper, give them different colors of yarn remnants and scissors and let them cut pieces of yarn to lay on the sticky paper - it can be free form or they can create a picture as if they were painting it! Don’t forget to add the top piece of contact paper to the finished project!


As your Littles’ skills grow, so can the complexity of the art experiences!
A Grand Tip!
As a Grand, you may only have adult size “paint shirts” in your home
and they may be quite large on your toddlers and preschoolers!
Gather the back and clip it with a chip clip to keep it on your Little…
just like a bride does when trying on wedding dresses!

TAPE RESIST ART!
Take Painter’s Tape and lay it over a piece of paper, as shown below. We found the tape stuck a little too much to construction paper, so if you have tagboard (or cardstock), that might work better. Lay out some paint and paint brushes, and let your Little free paint all over the paper!

Allow the paint to dry. Then carefully pull off the tape.
Abstract art at its best!

SQUISH & TWIST!
This activity is a fun way to explore color mixing! Your Little will need 2 white paper plates (we used the smaller, luncheon ones that had a bit of a lip on them). Turn the two plates upside down and then let your Little choose two colors of paint from three that are offered - red, yellow, blue. Add a few drops of the first color to one of the plates and then follow with a few drops of the second color. At this point, ask your Little to predict (or make his/her best guess) - what color will he/she end up with?

Carefully place the second plate on top of the first, so that the bottoms of each plate are together with the paint between them. Depending on your Little’s age, he/she may need some help picking the plates up and pressing them together as shown. When ready, have your Little “squish and twist” over and over again (for about 10-15 seconds). Of course, we were twisting and shouting as we did this step!

Then pull the plates apart
(this is when having the ones with the lips around the edges really helps)
and…

Voila!
Did your Little predict correctly!
ROCK PAINTING!
Rock painting is a fun way to bring nature into your art experiences and, as you’ll be able to tell from Laurie’s reflection below, it can be such a meaningful and memorable project, too!

We have a rock garden in our backyard that started when my own kids were young, and a pet passed away. Through the years we collected flat stones (mostly from Minnesota’s North Shore) and the kids would paint them as a memorial to their pets. (We have had a lot of pets over the years!) In elementary school, they would earn a Peter Pebble (a pretty painted rock) from church when they memorized a Bible verse or a prayer or a skill (such as learning the names of all the disciples). These special Peter Pebbles joined the rock garden as well as other pretty rocks they found and admired. I loved this solution to that age old question, What do you do with all those collections that accumulate in their rooms? Many of the stones and rocks are now faded, but Little D is fascinated with them just the same. She loves to carry them around, and rearrange them in the garden.
On a recent trip to the North Shore, Laurie picked up a couple of rocks for Little D to paint and she can then add them to that same garden! How special is that!

Because of her age, we used washable paint so the paint will wash away, but then she can just paint them again! When she is older, we will switch to acrylic paint or patio paint. She also added a few stickers to one rock as well. I hope this is a tradition the next generation will continue to love and add to as they (and their collections) grow!


Through process art, our older Littles can focus on
creating something new!
There is no wrong way to do it so our Littles are free
to explore and make their own decision,
resulting in their own original masterpiece!
TISSUE PAPER ART!
Tissue paper art, or painting with tissue paper is a relaxing and favorite activity for Littles of many ages! Choosing colors and painting water over them is very soothing and our toddler Littles are especially intrigued by the way the colors bleed together.

Give your Little 3-4 sheets of colored tissue paper - we used red, blue and yellow. Show your Little how to tear the tissue paper until he/she has a handful of pieces of each color. Give your Little a paper plate and show him/her how to put one piece of tissue paper down on the plate and then, using water, paint the paper. Then lay another piece of tissue paper down and paint and repeat, over and over again. Eventually, you’ll overlap a new piece of tissue paper onto another one and your Little will notice the colors change! Keep up with this process until your Little is happy with the artwork!

Once the tissue paper has dried, you will need to go back with a glue stick and glue the pieces to the plate as they won’t all stick! Older Littles will enjoy painting their tissue paper onto the plate with a mixture of ½ water and ½ Elmer’s glue rather than simply water (and this will alleviate the need to go back when the project is dry to glue the pieces in place then)..
FOIL PAINTINGS!
Your Littles will love giving this experience a try! Painting on foil is such fun… the surface is slippery so the paint seems to dance across it and the light from the room reflects off your artwork! Instead of using a paint brush, let your Littles use cotton swabs (Q Tips) as part of this new art experience!
You will need aluminum foil, cotton swabs, tempera paints and liquid dish soap, like Dawn. You will also want to cover your Littles work space! Tear off a piece of aluminum foil for each Little. Then, have your Little choose a few colors of paint. (At this point, we talked about what he was thinking of making and what colors he thought he’d need.) Put a dollop of each color on a plate or on a tray and add a few drops of dish soap to each. Stir together with a Q-Tip. NOTE: The dish soap will keep the paint from flaking off the aluminum foil!

Since the artwork is quite reflective we suggest adding a piece of colored construction paper behind it to finish it off!

Marble Painting!
We have one last project for you and we’ve saved the best for last! Have you ever made shaving cream marbled paper? If the answer is “no,” get ready for some extra special fun!
You’ll need a shallow baking dish like a pie plate or an 8 x 8 baking dish. You’ll also need some heavy paper (we used cardstock once again), liquid food coloring, a stir stick (we used a bamboo skewer) and a scraper of some sort (we used a separate piece of cardstock for this).

Cut the paper so that it will fit in the baking dish you are using. Spray a layer of shaving cream to cover the bottom of your baking dish. Now it’s time to add color! Your Little can choose 2 colors, adding several drops of each on top of the shaving cream. Next, your Little will use the stir stick (skewer) to swirl the paint around for a marbled look. You may want to demonstrate how to do this and encourage your Little to make swirls all the way to the edge of the pan, too. At this point, your Little can choose one more paint/food coloring color and, again, add several drops. Swirl once again!

When your Little is happy with the marbling effect he/she has created, it’s time to press the heavy paper onto the marbled shaving cream. Encourage your Little to gently press from edge to edge! Carefully lift the paper up and off of the shaving cream!

Then use a scraper (or another piece of cardstock) to scrape off the excess shaving cream. Take a look at your beautiful marbled paper! The combinations are endless and your Littles will want to make more and more!

Once your marbled paper has dried
your Little can turn it into a card or cut out hearts to give to loved ones!

Many of you have Tweens and Teens in your lives
who love making and creating art!
We’re highlighting a few sites you might like to visit…
Each offers some fun and age-appropriate options
for these special Littles!

From Kitchen Counter Chronicles
Get inspired by these awesome summer art projects for Tweens and Teens!

From One Little Project
String paint art is SO PRETTY and it's really simple to create! This is such a fun and easy art technique and a great art project for your Tween and Teen Littles!

From Keeping It Simple
Check out this great way to get some fresh air, get out of the house and get creative! All your Tweens and/or Teens need is Painter’s Tape and sidewalk chalk. Hours of fun are sure to follow!

As a Grand, displaying our Littles’ artwork shows them how proud we are and how much we value them. If you are a distant Grand, artwork is a way to keep your Littles close to you and show them you are thinking about them even when they are far away. Below is a picture of Grandpa’s office where Little D’s pictures are always delivered to be displayed.
NOTE: The artwork is currently at toddler height to be seen easier!

If you spend a day or a weekend this summer with your Littles
creating art together,
celebrate all their thoughtful work with an
Artists' Gallery
and invite other family members to stop by!
This is the Artists' Gallery
Laura's Littles (her grand niece and nephew)
recently created after a fun weekend at the lake!

Displaying a child’s artwork builds confidence
as it allows Littles to see, share, and take pride in the work they have created
with the people they love most in the world!
😍
Come back next week for our final blog post of the summer
when we wrap up our series,
Summer with the Grands!
It will be a special post,
At the Fair!
We then plan to take a few weeks off with our families!
We'll return in September with new content
that continues to celebrate
OUR GRAND LIVES!
Thanks to everyone who follows us on
We’re sharing several posts and stories/reels there each week!
May the coming week find you savoring the fleeting days of summer
and a glorious sunset or two with those you love!!


SPECIAL THANKS TO
Handmade Monday from Sum of Their Stories
A Morning Cup of Joe from A Pinch of Joy
Busy Monday from The Cottage Market
Weekend Traffic Jam Reboot from Women Living Well after 50
Making a Home-Homemaking Link Up from Linda's Lunacy
Thank you for featuring this post on your sites!
❤ We love our blogging community! ❤
❤️ We are delighted to join the following link up parties and blog hops! ❤️
MONTHLY
SUNDAY
MONDAY
TUESDAY
WEDNESDAY
THURSDAY
FRIDAY
SATURDAY


These are fantastic! I remember doing some of these when my girls were little.
Thanks' bunches for sharing Art A Whirl Summer Camp With The Grands with Sweet Tea & Friend's this month dear friend's.
We never did the squish and twist but have tried most of the rest of these (or some variation!).
I love all of your creative ideas! I enjoy visiting your blog and seeing what's new. Thank you for joining us every week at The Crazy Little Lovebirds link party. It's always a pleasure to have you join us.
Steph@CrazyLittleLovebirds 🤗
Such great ideas for the grandchildren to get creative. Love the idea of edible finger painting for the littlies who always want to put things in their mouths! I also love how you've given ideas for different age groups. Enjoy your summer camp! Thanks for sharing at #WeekendTrafficJamReboot. I've selected your post as one of my favourites to feature in next week's post. Have a lovely weekend. x
Count me in for squish and twist, looks like fun. You guys are fun grannies, can I come and play? Lol.
I really appreciate you guys sharing your grands and activities with Sweet Tea & Friends every month.